This post contains affiliate links.
How many times have you heard this: You need an email list for your business.
Well, it’s true … you do! Social media followers are great, but hopefully you’re collecting their email addresses as well. That way if something ever happens to your social media accounts, you have a way to reach your fans.
If you’ve been putting off starting an email newsletter because you don’t know where to begin, I’m here to help! Yes, maintaining an email newsletter is yet another thing to add to the to-do list. But the most important step is to get started with a way to capture and collect those emails. And that’s exactly what we are going to cover today!
For this tutorial, I will be using an email service called MailChimp. MailChimp offers a free plan up to 2000 followers, so it’s perfect for anyone who is just getting started. If you want a more robust email experience and you are willing to pay, I recommend the paid version of MailChimp or Convertkit. But for this tutorial I will be using MailChimp.
If you’ve got 30 minutes, you can do this first step for creating an email list and start collecting those email addresses! Follow this guide and it won’t be difficult at all, I promise.
How to Set Up a FREE Email List in Under 30 Minutes
Step 1 – Create and log into your MailChimp account. On the main page, select Lists. Then click on “Create List.”

Step 2 – You will be asked if you want to create a new list or group. You want to “Create List.”
Step 3 – Fill out the List details. Give your list a name (“Your-business-name Newsletter” works), use your business email address as the Default “From” Email since this is what your readers will see (don’t use your personal email), your business name as the Default “From” name, as this is what your readers will see as the sender in their in-box (don’t use your real name [unless your real name is also your business name] because your readers don’t know YOUR name, they know your business name. Make sense?). For the “Remind people how they got on your list” section, you can copy and paste this:
You are receiving this email because you opted in for the YOUR BUSINESS NAME newsletter.
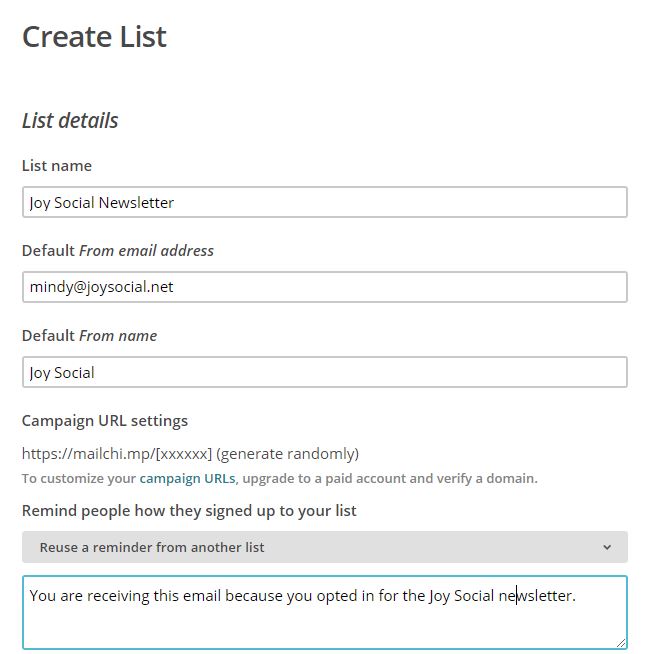
Make sure your contact information is correct. You need a valid address for the U.S. CAN-SPAM Act. It can be a physical address such as where you live or conduct business, or a PO Box. You cannot make up an address. This is very important.
Next you’ll see a section about double opt-in. I recommend turning this on. This means new subscribers will receive an email asking them to click a link to confirm this subscription. It helps eliminate bots and spammers, so I see it as a good thing.
Then select your email list notification options. This is to control the emails YOU get as people subscribe (or sadly unsubscribe) to your email list. I recommend the first option, which is a daily summary.
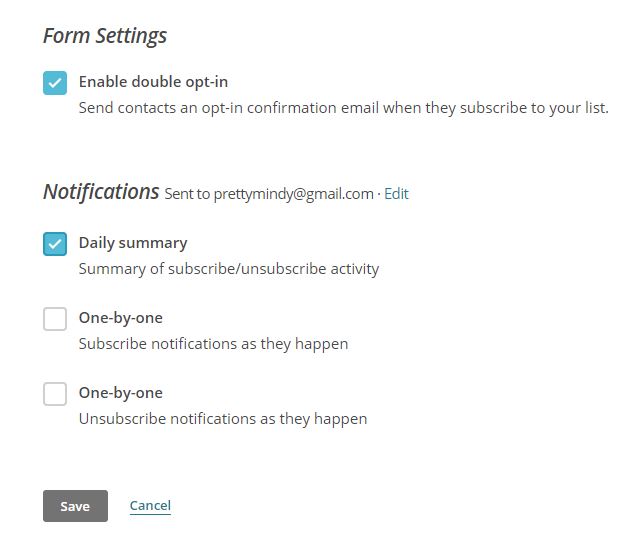
Click SAVE.
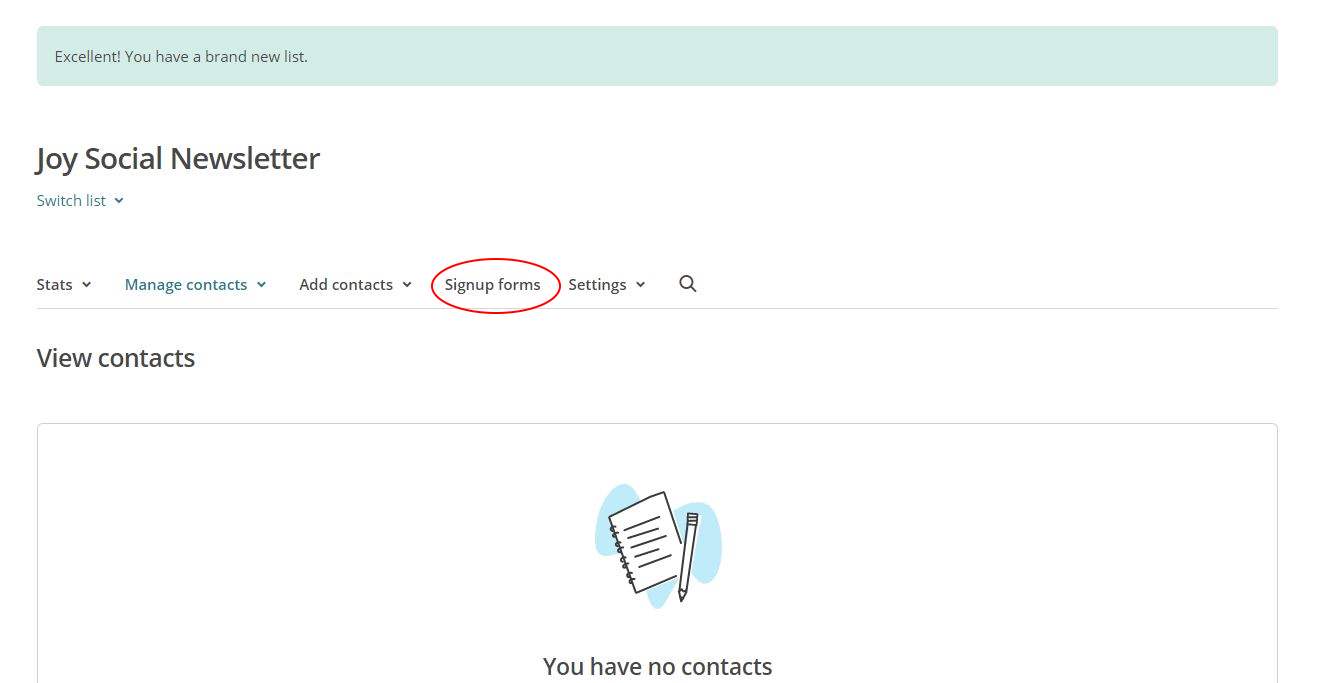
Step 4 – From here you will see your new list! Now we need a way to tell people about your list. Click on “Signup forms.” Then go to “Form Builder” and hit “select.”
Step 5 – This page is a little busy but don’t worry, we will get through it!
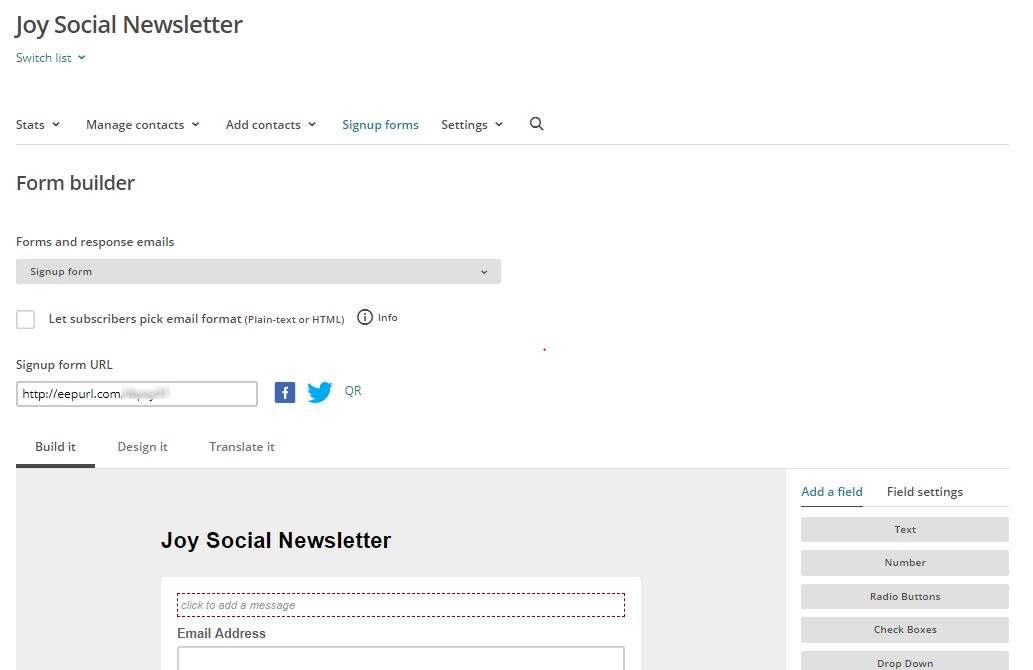
The default screen is “signup form” under the “Forms and response emails” dropdown. Leave it like that.
The Signup Form URL is going to be your unique URL you can send to people to join your list. You can post this URL on your social media pages, or hyperlink it on your blog. You can test it right now – open a new browser tab and copy/paste in that URL so you can see what it looks like. Although, I recommend making the following modifications before you share the link:
The default signup form is very robust. It asks for a lot of things, like email, name, address, and phone number. I don’t think you need all that! I recommend only asking for email and first name.
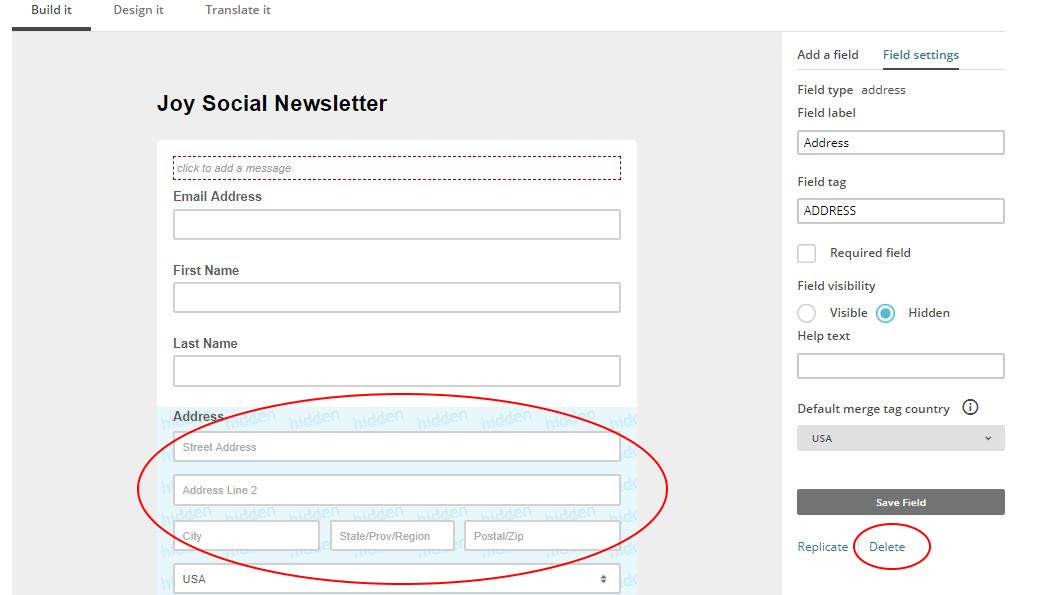
In order to remove the Last Name, Address, and Phone number section. Simply click on that area on the form. The toolbar to the right of the form will change, and at the very bottom you will see “Delete.” Click on that to remove the field. (It will ask you to confirm by typing DELETE into a field. Go ahead and do that.) Do this for the Last Name, Address, and Phone Number field, until you only have the Email Address and First Name fields left.
You don’t have to “save” anything – it saves by default.
Your signup form page is complete!
Now let’s assume you want to put this form somewhere on your website, like in the sidebar or below your blog posts, or in the footer. I’ll get you started, and if you’re not familiar with how your website works you may have to contact your webmaster for help.
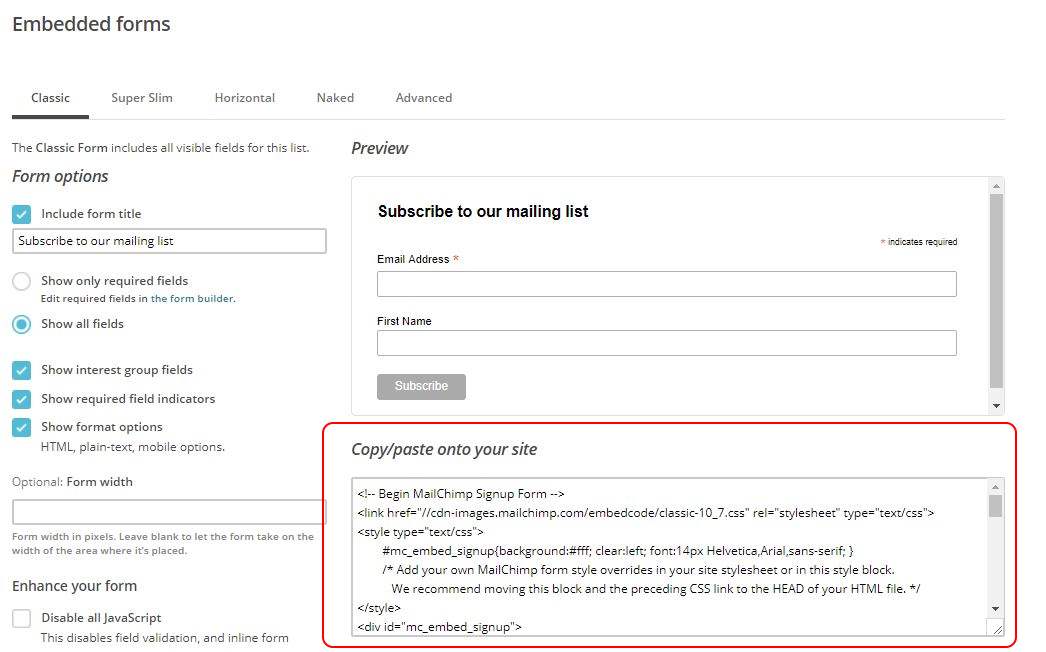
Step 6 – On MailChimp, click on Signup Forms at the top menu, and now click on the Select button for “Embedded forms.”
Step 7 – Under the “Preview” section, you can see the beautiful signup form you just created! Isn’t it so lovely? This is how it will look when embedded into your website. Just copy/paste the code at the bottom and place it into the backend of your website in the desired spot.
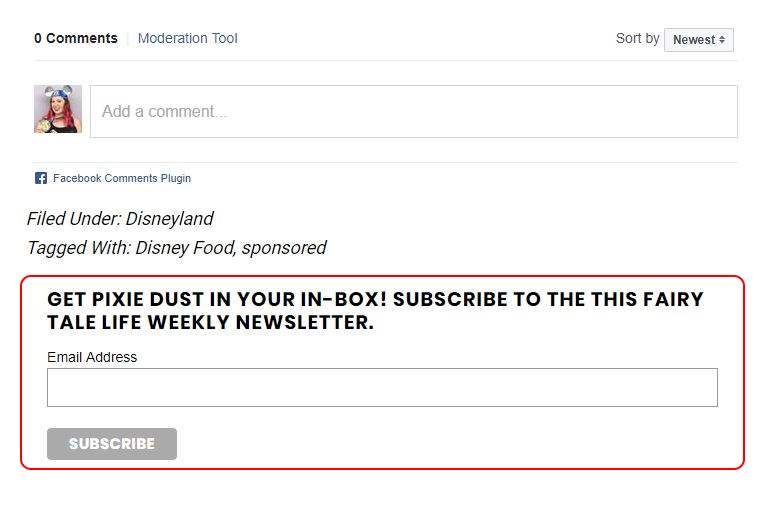
For me, I have a WordPress blog with the Genesis theme, and I used the Simple Hooks plugin to add the code so it shows up at the bottom of every blog post. You can see how it looks below. If this is gobbledy-gook to you, you may have to reach out to your webmaster for some assistance. Or use Google to search how to add this code to your own website setup.
Congratulations! You are now ready to collect emails for your business! How exciting! I hope this tutorial was helpful and if you have any questions, feel free to leave a comment or visit my Facebook Page – Joy Social Media Strategies.
[signature]
